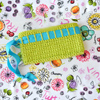
Introducing the Lucky Wristlet!

This is the photo tutorial for making a Ribbon Strap for the Lucky Wristlet.

This is the photo tutorial for crocheting my Lucky Wristlet pattern.
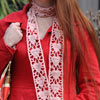
You may have already seen this over on CRAFT Magazine's site, but just in case you didn't, I designed a crochet pattern for them ... this cute
crochet heart scarf.
Episode 6 - Finishing touches: three rows of single crochet at the top of the bag and attaching the granny straps. Click through to the post to get more info and links to helpful tutorials.
Episode 5 - Row 4 of a half hex motif when you join it to the tote. Click through to the post to get more info and a crochet chart.
Episode 4 - The first three rows of a half hex motif. Click through to the post to get more info and a crochet chart.
Episode 3 - How to join a corner hex. Click through to the post to get more info and a crochet chart.
Episode 2 - How to crochet row 4 of a hex motif and how to join as you go. Click through to the post to get more info and some crochet charts.
Episode 1 - The first three rows of a hex motif. Make 26 to start The Hex Tote. Click through to the post to get more info and a crochet chart.
Episode 3 covers the bottom row3 and beyond of the Starling Handbag. Be thankful I hadn't lined up any jokes for this one. ;)
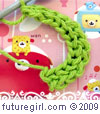
When I was first learning foundation single crochet (fsc), I found that I made the chain part of the stitch very tightly. This is because I wasn't pushing my hook through the loops all the way; I was just using the tip. When the chain part is tight, your fsc row will start to curve in on itself.
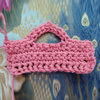
This is a supplement to the original
foundation single crochet tutorial. Here I show you how to make a foundation single crochet bridge in the middle of your work. I first used this when making the Icelandic Turtleneck for the arm holes. I also use it to make the handles on my handbags.
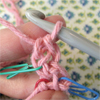
This foundation single crochet tutorial is broken down by each teeny-tiny step. When I first attempted to learn this technique from a magazine, I had pretty good illustrations to go by, but I was still totally confused by the whole thing. It took me 3 or 4 tries over a couple of months to even feel confident that I was doing this correctly.
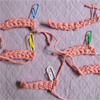
I'm preparing to write a foundation single crochet tutorial for the blog. For those of you who are unfamiliar with foundation single crochet, it's the act of creating a row of chain and single crochet all at once to use as a foundation for more rows. It replaces the initial chain that starts most projects.
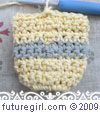
This way to do seamless single crochet is way-better than
my original single crochet tutorial, especially if you're doing color changes. Why? Because it's simpler, the color changes are cleaner looking, and there are no complicated stitch depths involved. I posted a
comparison of the two techniques if you'd like to see the differences. Even a newbie will be able to follow this tutorial.
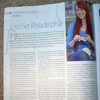
I'm so excited to tell you about the article I wrote for Interweave Crochet's Summer Issue! They have a reoccurring column called "Crochet Around Town" that focuses on the crafty/crochet/fun spots in a certain city. In the last issue the illustrious
Vickie Howell wrote a great piece about Austin. I almost exploded when Interweave emailed me and asked me to write a tour of crafty Philadelphia.
I was really excited that a crochet project of mine was included in the
Anticraft book. I designed this lined crochet tote bag so it would be a canvas on which you could add your own personalized design. I submitted two designs for the book.
The "I [Skull] Trouble Tote" is actually mentioned in the promotional blurb, which totally set me on fire when I noticed. I included a chart for the whole alphabet with this design so that the saying could be personalized, Everyone has something important to say on their tote, right? :)
The second design is the Apothecary Tote. I was inspired by Victorian apothecary medicine bottles. When I was adding this design to the tote using my graph paper chart, I miscounted the spaces and had to redo it 4 or 5 times. It was driving me nuts! But I really loved how it turned out.
While writing up the crochet instructions for the tote, I realized how hard it is to actually explain in words how I do the seamless crochet technique. Supplementing this pattern is a lot of the reason I put my seamless crochet tutorial on the web.
I also plan on posting a tutorial showing how I hand sew my linings into my crochet bags. Several people have asked about it, and it would be a good supplement for the book, as well.
I'm compelled to write tutorials because I HATE it when I get the instructions for a project and they blithely say things like "sew the lining into the tote." HOW?! It seriously drives me nuts when they give no hint or clue about the techniques they actually used to do it. I don't want to be a part of THAT problem. :)
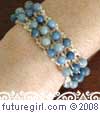
This easy-to-crochet bracelet is perfect for summer fun. The cotton thread is washable so you can wear it through all your outdoor adventures.
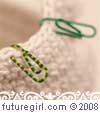
I've decided to embrace my inner cheapskate and add to my paper clip stitch marker stash. For all you thrifty chicks who want some inexpensive, colorful stitch markers, here's how I make them ...
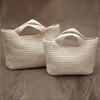
The tiny bird bag is all grown up. I've been crocheting up a storm. The large bag is 13" across at the top, 7.5" high to the bottom of the handles, and 3.5" deep across the flat bottom. The medium bag is 11.5" across at the top, 6" high to the bottom of the handles, and 3" deep across the flat bottom. I'm working on a small version right now. They'll be like a set of Russian nesting dolls.