When you read this tutorial, my instructions might seem terribly obvious. But if you look at the stitching on my first stuffie, you'd see it wasn't obvious to me. :) Now that I've worked out a system, I'm able to jump right into my felt projects without having to labor over, and struggle with, the stitching.
For other options to hand sew felt see my
blanket stitch tutorial and my post about
choosing between whip stitch and blanket stitch.
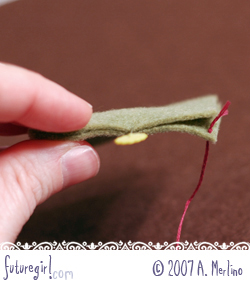
(1) Place the wrong-sides of the felt layers together and pin or baste them together.
Note One: All stitches should go in and come out about an eighth of an inch back from the edge of the felt.
Note Two: I used to struggle with knotting my floss, but Heather Bailey's
Best Knot Ever Tutorial changed my hand sewing and embroidery forever. Seriously.
On the right-hand side, take your knotted floss and go from the inside of the bottom layer through to the outside. The knot should be sandwiched between the two layers with your floss coming out of the bottom layer.
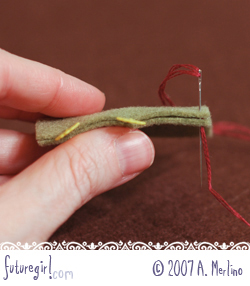
(2) Put the needle through the top layer exactly above where the floss is coming out of the bottom layer. Push the needle through the original hole in the bottom layer. Pull through both layers.
This stitch will help anchor the two layers of felt together to minimize slipping as you sew.
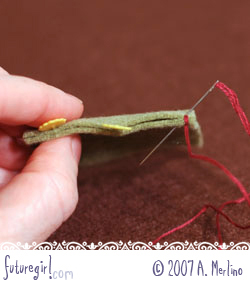
(3) Put the needle through existing hole in the top layer. Put the needle in at an angle so the point comes out of the bottom layer about an eighth of an inch to the left of the first stitch. Pull through both layers. This stitch will cover the first stitch.
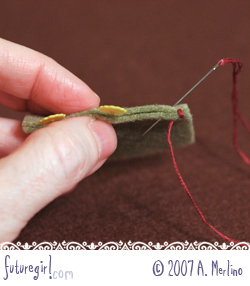
(4) Put the needle through the top layer above where the floss is coming out of the bottom layer. Put the needle in at an angle so the point comes out of the bottom layer about and eighth of an inch to the left of the previous stitch. Pull through both layers.
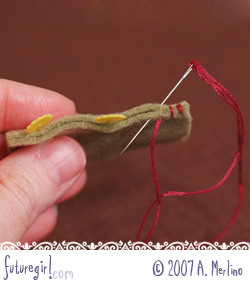
(5) Repeat across.
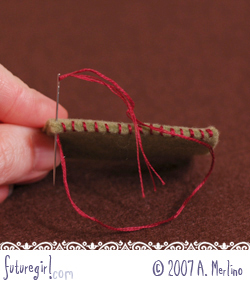
(6) When you make your last stitch, put the needle through the top layer above where the floss is coming out of the bottom layer. Push the needle through the last hole in the bottom layer. Pull through both layers.
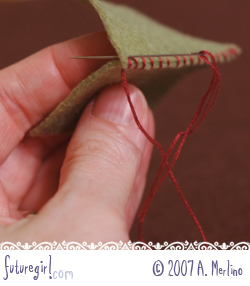
(7) Put your needle through the last hole in the top layer so the needle point is between the two layers of felt. Pull through. This stitch will cover the last stitch you made.
[FOR A CLOSED SHAPE - Put your needle in through the last hole in the top layer so the needle point comes out of the seam between the two layers next to the last stitch. Pull the needle through to the outside of the piece.]
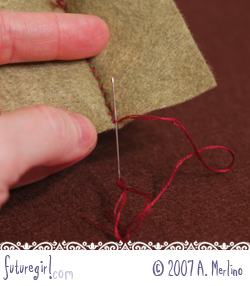
(8) On the inside of the two layers of felt, put your needle under the last stitch.
[FOR A CLOSED SHAPE - Put your needle's point back through the seam and catch an inside diagonal stitch. Sometimes I leave the last inside diagonal stitch a little loose so it's easy to catch. If you can't catch an inside diagonal stitch, you can put your needle under one of the outside stitches.]
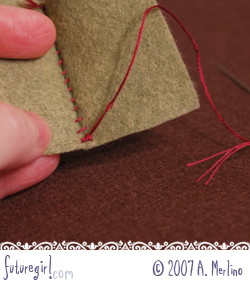
(9) Wrap the floss around the tip of your needle two times, and pull the needle through to create a knot on the inside of the two layers.
[FOR A CLOSED SHAPE - Whether you caught an inside stitch or an outside stitch, after you make your knot, put the needle in through the seam and pull it out somewhere else on the piece. Tug on the floss a little to pull the knot through the seam to hide it. ]
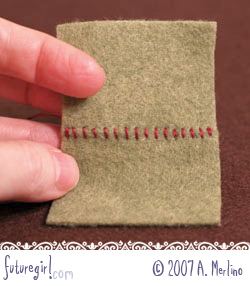
(10) Pull the pieces apart to flatten the stitches.
When making a stuffie, put about 2 times the amount of stuffing that you think will fit in your piece. As long as you aren't misshaping your stuffie, keep adding stuffing. Tightly packed stuffing pulls the pieces apart so the stitches will lay flat. Also, the tighter you stuff your piece, the less lumpy it will look.